Drupal provides a simple user interface to create or delete the users from the Drupal system. User accounts are required to login into the Drupal system to access Drupal functionality. In this article, we are going to discuss the steps required to create or delete the users.
Step 1. Sign in to your Drupal-based website as an administrator.
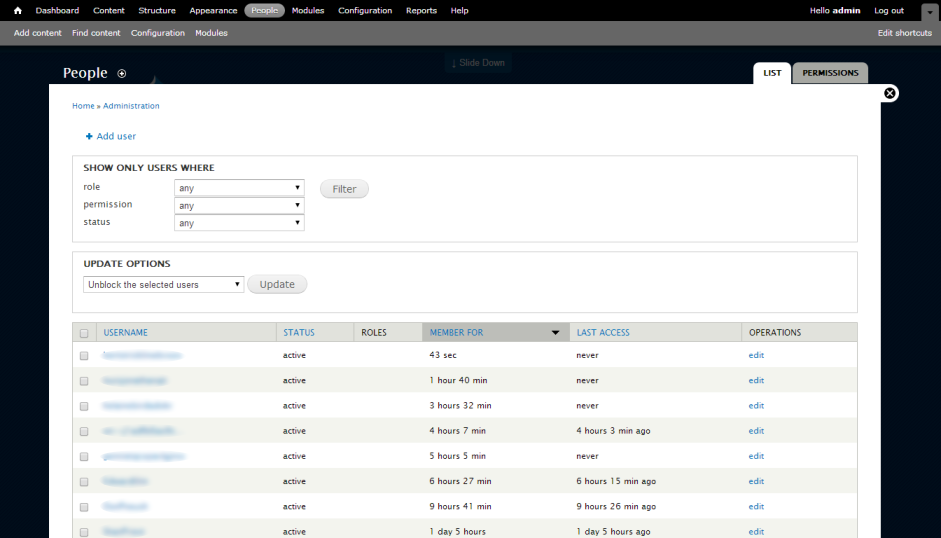
Step 2. Click on the “People” link on top of the page. Drupal will display a “People” page, from where you can manage the users. “People” page will display with three sections:
Drupal – People page
Filter section, where you can filter the list of users based on their assigned role, permission, or status.
UPDATE OPTIONS section is to apply operations (block/unblock, add role/remove the role, and cancel) on the selected users.
The list of users section will display the available users in the Drupal system.
At least one item must be selected from the list of users section, in order to update the users from the UPDATE OPTIONS section.
The data displayed in the list of users section can be controlled based on the selected filters from the Filter section.
Step 3. To create a user, follow the below steps:
Step 3.1. Click on “Add user” link from “People” page. Drupal will display the necessary fields to create a user.
Drupal 7 – People page – Create user
Step 3.2. Provide name of the user in “Username” field.
Step 3.3. Enter the valid e-mail id in “E-mail address” field. This is required field to send the e-mails from the Drupal system. For example: if you forget your login password, Drupal system will send a reset password link to the registered e-mail id to change your account’s password.
Step 3.4. Enter password into “Password” and “Confirm password” fields. The strength of the password (Weak, Fair, Good and Strong) will be shown next to the “Password strength:” field. Strong passwords are difficult to break; so, it is always recommended to choose a strong password.
The password entered in the “Confirm password” field must be the same of the password entered in the “Password” field. Otherwise Drupal will display “no” text in “Password match:” field and doesn’t allow you to create a user. If the passwords are matched, Drupal will display the text “yes” in “Password match:” field and you are allowed to create a user.
Step 3.5. From “Status” you can choose either “Blocked” or “Active” options.
“Blocked” users are not allowed to login, even though the user got created.
“Active” users are allowed to sign-in into their accounts using their user credentials.
Step 3.6. Available user roles are displayed under “Roles” section.
You can choose at least one role by selecting the checkbox before the role name.
By default “authenticated user” role is selected, and you are not allowed to deselect this role. You are allowed to select any number of roles.
Depending on the roles assigned to the user, the user can access the features in the Drupal system.
Step 3.7. Select the checkbox “Notify user of new account” to send a notification to the registered e-mail id when the user got created.
Step 3.8. Once you have provided all the necessary details, click on “Create new account” button, to create the user with the given details.
Once the user is successfully created, the user entry will be displayed in the list of users section in “People” page.
Step 4. Follow the below steps to delete the user:
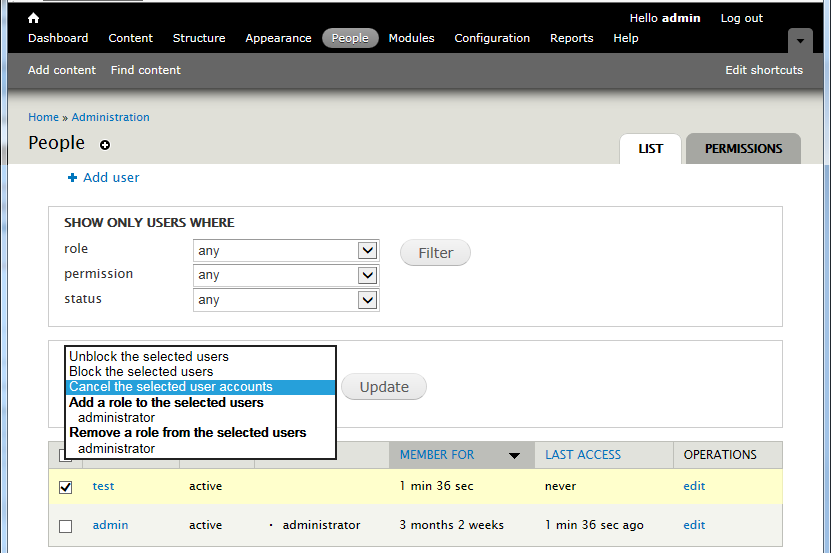
Step 4.1. From list of users section, select the user(s) you want to delete by selecting the checkboxes before the user name(s).
Drupal 7 – Select users to delete
Step 4.2. Now from “Update Options” section, which is on top of the list of users:
Select the combo box. Drupal will display the drop-down list.
Select the entry “Cancel the selected user accounts” from the drop down list.
Click on “Update” button.
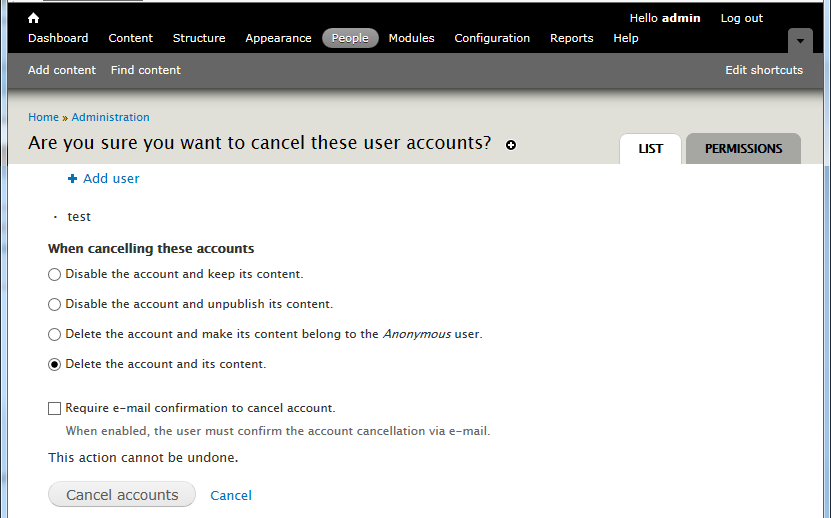
Step 4.3. Drupal will display “Are you sure you want to cancel these user accounts?” page, to allow you to:
Disable the selected accounts or.
Delete the selected accounts.
Step 4.4. If you want to keep deleted user(s) data, select “Delete the account and make its content belong to the Anonymous user” option; otherwise, select “Delete the account and its content” option from “When cancelling these accounts” section.
Drupal 7 – People page – Delete selected users
Step 4.5. If you want to delete these account(s), only when the user confirmed then, select the checkbox “Require e-mail confirmation to cancel account”. Otherwise, don’t select this option.
Step 4.6. Click on “Cancel accounts” button to delete the selected user account(s).
Step 4.7. Upon successful deletion, Drupal will display a success message.
Step 5. Go back to the “People” page, and you can find the selected user accounts are not displayed in the list of users section.
<Mourya>
Drupal 7 – Adding and deleting Users
2 thoughts on “Drupal 7 – Adding and deleting Users”
I want all these ‘bot’ names on one page so that I can delete them in one go 🙂 . I wonder whether that’s possible. Please help.
Yes, it is possible. You need to Apply the filters to display the Users based on their role, permissions or status.
But before that, you need to control the way you are allowing the Users to create their Accounts in your website.
– Don’t allow the Users to create their accounts without any moderation.
– If it is required to allow, by default assign a specific Role to them. And later during the moderation, you can change their Roles.
We use cookies to ensure that we give you the best experience on our website. If you continue to use this site we will assume that you are happy with it.Ok


I want all these ‘bot’ names on one page so that I can delete them in one go 🙂 . I wonder whether that’s possible. Please help.
Yes, it is possible. You need to Apply the filters to display the Users based on their role, permissions or status.
But before that, you need to control the way you are allowing the Users to create their Accounts in your website.
– Don’t allow the Users to create their accounts without any moderation.
– If it is required to allow, by default assign a specific Role to them. And later during the moderation, you can change their Roles.