
VMWare Workstation enables us to set up Virtual Machines. In this article, I explain how to create a New Virtual Machine using VMWare Workstation 12 & install CentOS 7 64-bit Operating System on it. I split this article into 2 parts. In one part, I explain how to create the new Virtual Machine and in the second part, I will explain how to Install CentOS 7 on it.
Step 1. Download CentOS 7 64-bit version from https://www.centos.org/. If you want to download, 32-bit version; you download them from alternate releases; Base CentOS releases don’t have CentOS 7 32-bit version.
I have downloaded CentOS 7 64-bit version to my Windows 7 64-bit version system. The downloaded file name is “CentOS-7-x86_64-Everything-1804.iso“.
Step 2. Mount the ISO file to use as a Virtual Drive. It is not mandatory. You can select the “.iso” image file from the folder location in the below step, “Step 5”.
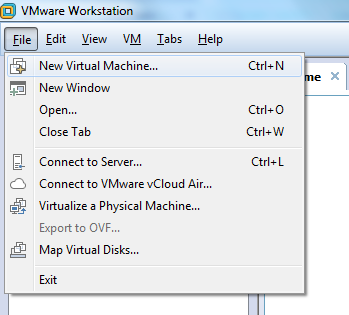
Step 3. Open VMWare WorkStation 12. And select the File menu and then click on the “New Virtual Machine…” menu item. VMWare WorkStation 12 will open, “New Virtual Machine Wizard” window to allow you to start creating a new Virtual Machine.

Step 4. From “New Virtual Machine Wizard”, select “Type (recommended)” configuration under “What type of configuration do you want?”. By selecting the recommended configuration, we can create the Virtual Machine in a few easy steps.

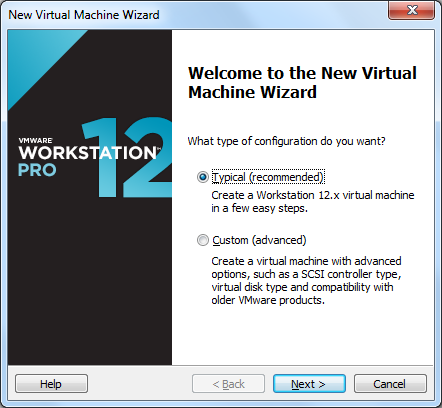
Click on the Next button to select the image file (.ISO file); the CentOS 7 iso image file.
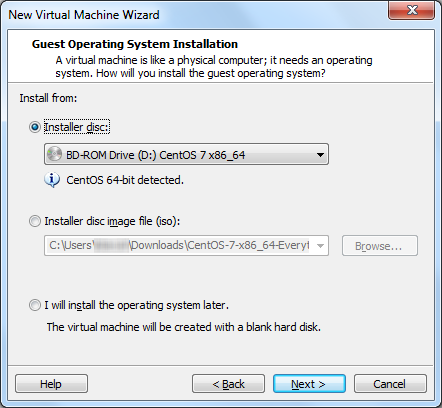
Step 5. Select the disc where we have the image file. We already mounted to a Virtual Drive, in our previous step. Select the Virtual Drive from “Installer disc: “. Once the image file is selected, click on the Next button to name the Virtual Machine.
Note that, If you are not mounted the “iso” image file to a Virtual Drive, in “Step 2”; select the option “Installer disc image file (iso):” and click on the “Browse…” button to select the “iso” image file.
Step 6. In the “Name the Virtual Machine” wizard, enter the name of the Virtual Machine in the “Virtual machine name:” field and select the location where you want to install it from the “Location:” field. Click on the Browse… button to select the location where to install.
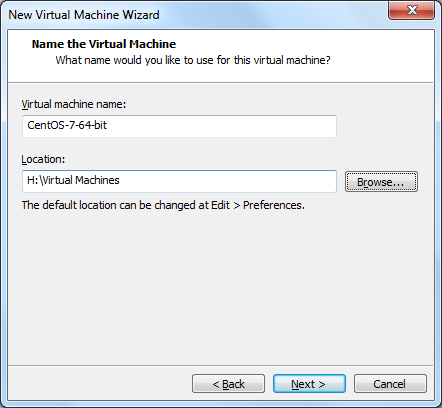
Click on the Next button to specify disk capacity.
Step 7. From “Specify Disk Capacity”, provide the disk size for CentOS in the “Maximum disk size (GB):” field. Even though the recommended size is 20GB; you can provide the maximum size depending on the requirement. I have given 50 GB.
And select the “Split virtual disk into multiple files” option, to make it easier to move the Virtual Machine to another Computer. But this selection may reduce the performance with very large disks.
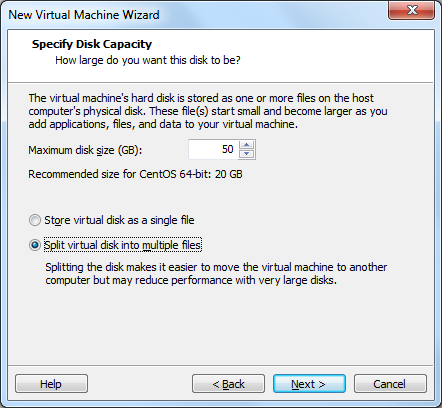
I have selected “Split virtual disk into multiple files” because it is easy to move the Virtual Machine to another Storage device.
Click on the Next button, to review the settings we have given for creating the Virtual Machine.
Step 8. From “Ready to Create Virtual Machine”, review the settings that you have provided. Observe that, by default VMWare Workstation, has allotted the Memory 1024 MB (1 GB) to run the CentOS. This is not sufficient to run more Applications. You can increase the size of the memory depending on the requirement. I increased this to 4.5 GB (4608 MB) for my installation. How to do this? Below steps explains it:
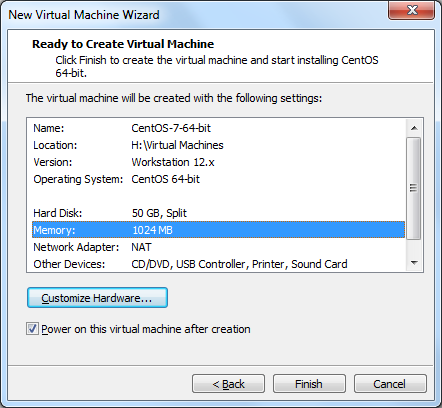
Step 8.1. Click on the “Customize Hardware…” button, to change the Hardware settings. VMWare Workstation will open the Hardware dialog to allow us to change the Hardware settings.
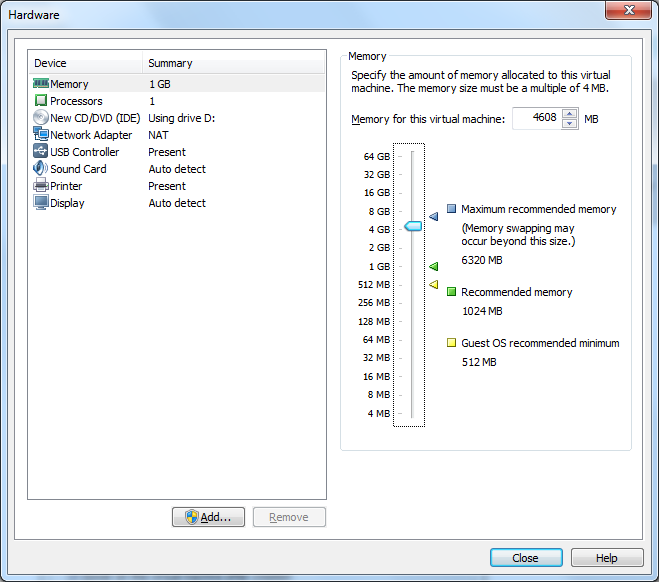
Step 8.2. From the Hardware dialog, increase the allotted memory for the Virtual Machine to 4.5 GB (4608 MB), by entering the value in the “Memory for this virtual machine:” field which is under the Memory group. And you can change the settings for other devices by selecting the respective device from the list; click on the Close button to apply the changes.

Step 8.3. Observe that the Memory allocated for the virtual machine is updated to 4608 MB from 1024 MB.
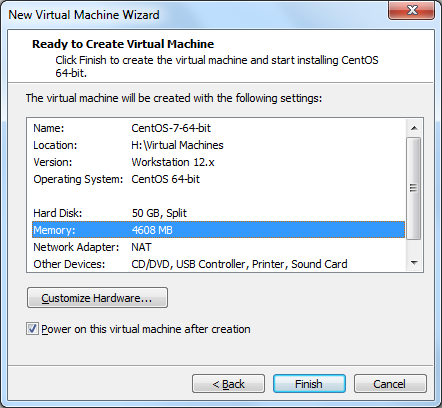
Click on the Finish button to start the Virtual Machine creation and install CentOS 7 64-bit on it.
I will continue this article in the next Part, (Part 2); and will explain the installation of the CentOS 7 64-bit Operating System on our newly created Virtual Machine.
🙂 Sahida
One thought on “VMWare Workstation 12 : Create Virtual Machine and Install CentOS 7 (Part 1)”