
We have discussed exporting All content from the WordPress site in the Article “WordPress – How to Export All content from WordPress site?“. And also discussed how to export partial content from WordPress in the previous Article “WordPress – Export the Posts, Pages or Media content“. In this article, I would like to go through importing the content to a WordPress site.
Step 1. Login into your WordPress site as an Administrator.
Step 2. Once logged in, place the mouse cursor on the Tools tab or click on it. WordPress will display a list of options available under the Tools tab.
Step 3. From the Tools options, select the Import option. WordPress will display an Import page to allow you to import posts, pages, comments, etc, from another site to the WordPress site.
WordPress has the option to import the site content from another System (non WordPress site also). To do this, a related Importer tool should be installed. On the Import page, it displays a list of tools available to import the content to a WordPress site.
Click on the “Install now” option which is under the WordPress entry. WordPress will install the Importer tool to allow to import of posts, pages, comments, custom fields, custom post types, post meta, categories, tags, authors, etc,
In this article, we will look into the options to import WordPress content to the currently logged-in WordPress site.
Upload exported data file to import
Step 4. Once the Importer tool is installed click on the “Run Importer” option. This will open the “Import WordPress” page to allow to upload, the exported data file to import to the WordPress site.

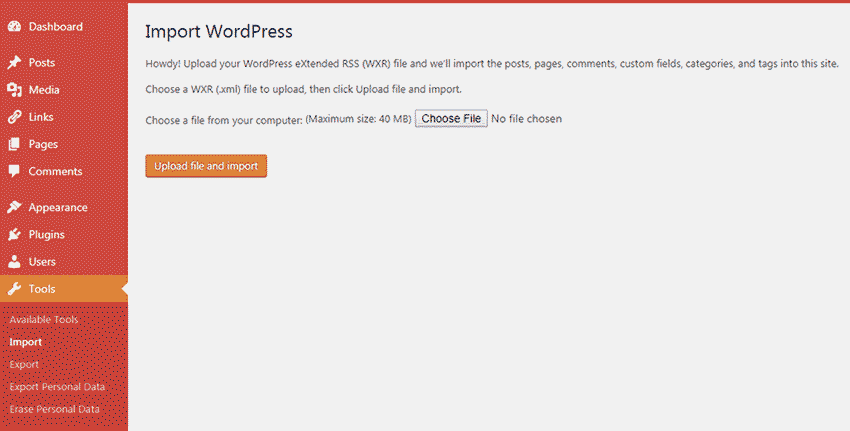
Step 4.1. From the “Import WordPress” page, select the “Choose File” option to select the data file to import. Once the file dialog is opened, select the file.
Step 4.2. Once the file is selected, click on the “Upload file and import” button to upload the file and start importing the content into the WordPress site.
Step 4.3. The content in WordPress is assigned to the Authors or the Admin user. The content you exported has the details of the Authors. You must map the content to the currently existing Users in the current WordPress site.


Depending on the author details in the content, the WordPress Importer tool will display the options to Assign Authors to the content.
- Provide the new User name in the “create new user with login name:” field to create a new user and Assign the user to the content.
- To assign the posts or content to the existing user; select the user from the “assign posts to an existing user:” field.
- If you do not provide entries to these fields, the content will be assigned to the Admin user.
Also, select the “Download and import file attachments” checkbox under Import Attachments to download and import the attachments.
Step 4.4. Once the selection is done, click on Submit button to start importing data into the WordPress site.
Step 5. Once the import is done, verify whether the content is uploaded into the WordPress site by visiting the related posts. If you do not see any Errors means; your content is imported Successfully.
We will discuss more topics in upcoming Articles.
🙂 Sahida