
When you double-click a file in Windows Explorer, Windows will open the file. If you click on an Excel file, Windows will open the file in the Microsoft Excel application; if you click the Text file, Windows will open the file in a Notepad, etc. How does Windows know which Program to use to open the file? This is where file type association comes in to picture.
When you double click on the file, Windows first verify the type of file and it verifies is there any Program associated with the file. If it finds a Program, it opens the file in the associated Program. Otherwise, Windows displays the “Open with” dialog; where it allows the user to select the Program to open the file.
How do Windows know whether the file type is associated with a Program? This is through Windows Registry. Windows maintains the details of the file type association in the Windows Registry and it verifies whether the association exists. If exists, it opens the file in the associated Program.
Through this article, we will discuss associating a file type with a Program.
Associate a file type with a Program
Step 1. Click on the Windows Start button and then select “Default Programs” from the Start menu. Windows opens the Control Panel to allow you to choose the Programs that Windows uses by default.
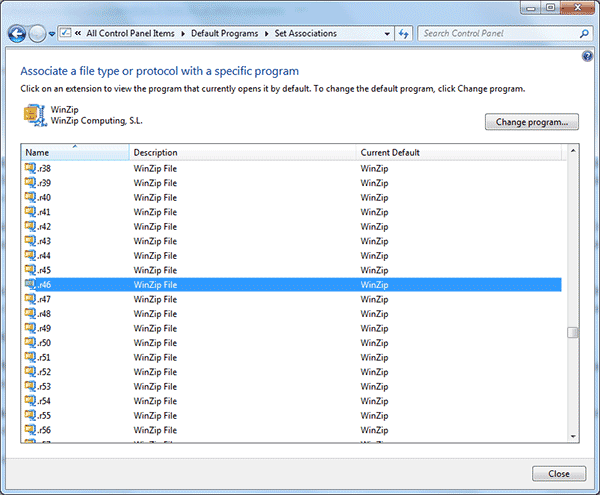
Step 2. Select the “Associate a file type or protocol with a program” option. Windows displays a list of associations. It displays the extension type, the description of the association, and the default associated Program.
Step 3. From the list of associations, select the file type for which you want to set the default Program and then click on the “Change program…” button. Windows will open an “Open with” dialog to allow you to select the Program.

Step 4. In the “Open with” dialog, you will see Recommended Programs and Other Programs sections. If you do not see the Programs under the Other Programs section; click on the arrow next to it to expand the Programs list.
Step 5. Select the Program you want to associate with the file type. If you do not see the Program in the list; click on the “Browse…” button to open the dialog to select the Program. Navigate to the location where the application files are stored and select the Program; then select the Open button.
Step 6. To apply the changes, select the OK button from the “Open with” dialog. Now the Program is associated with the file type.
Step 7. Double click on the file (with the same file type where you just set the Program through the above steps), and observe that the file is opened with the associated Program.
We will discuss more topics as we go.
🙂 Sahida