
Adobe Photoshop provides grateful features to deal with images. In this article, I am going to explain how to Crop the images using Adobe Photoshop CS6 Application.
Step 1. Open an Image in Adobe Photoshop CS6 Application.
We can open an image by right click on the image and selecting Open with -> Adobe Photoshop CS6 from the context menu. Windows Operating System opens the Image in Adobe Photoshop CS6 Application. OR
Select File menu -> select Open… menu item. Photoshop application will open, Open dialog. Select the image file, you want to open, and click on the Open button. OR
Double click on the image you want to open. If Adobe Photoshop CS6 Application is configured as the default application to edit the images; the selected image will open in Adobe Photoshop CS6 Application. Otherwise, follow the above options, to open the image file.
Step 2. Once the image is opened, from the Tools window, select Crop Tool. Below is the screenshot, showing; select the Crop Tool (C).
If you do not see the Tools window, select the Window menu -> select the Tools menu item; to display the Tools window.

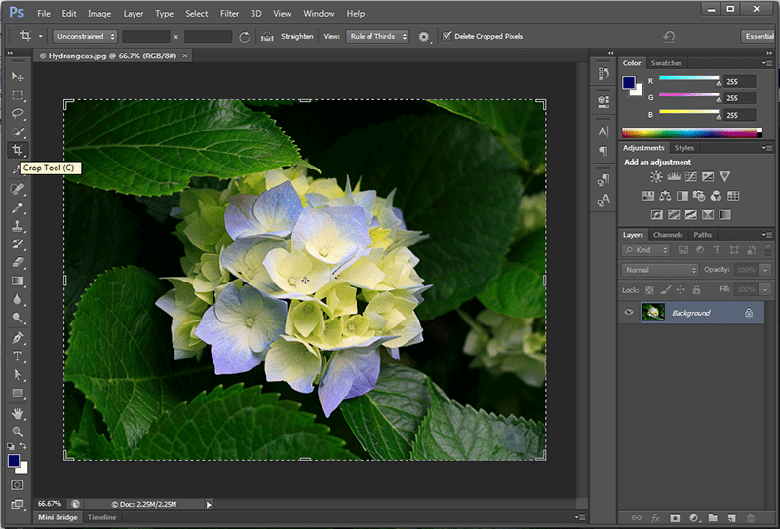
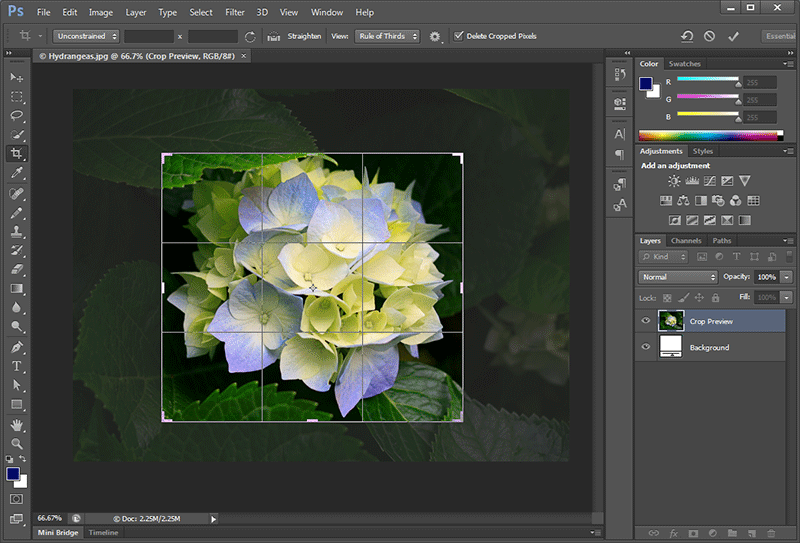
Photoshop will display the crop borders around the image allowing us to crop the image. Hold the crop border and drag until the area; you want to crop the image. You can crop the image inside or outside.
Even we can rotate the image also; to rotate the image, move the mouse cursor to the corner of the image. Crop cursor shape will change to rotate cursor shape. Hold the mouse button and move it, to rotate the image.
Step 3. Once all the borders are cropped press Enter key to confirm the cropping. Now we need to save the changes that we have done.

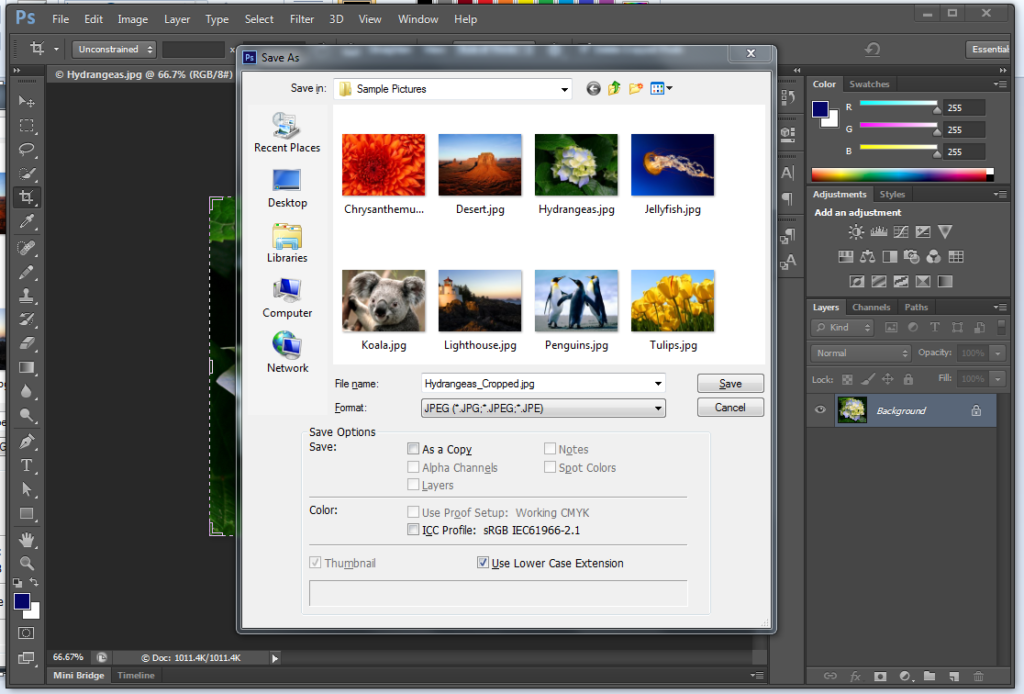
Step 4. Click on File menu -> and then select the “Save As…” menu item. Photoshop will open the “Save As” dialog.
Provide the file name in the “File name:” field.
Select the file format PNG, JPEG, PCX, etc., from the “Format:” drop-down box.
Click on the Save button to save the changes.

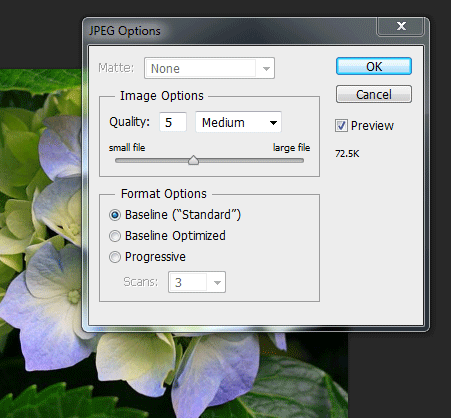
Step 5. Photoshop will open the options dialog; which is depending on the image you have selected to select the options for the image.
For example, I have selected a JPEG image; so Photoshop displayed the JPEG Options dialog.
Keep the default values (you can change the values if you want) & select the OK button to save the image.

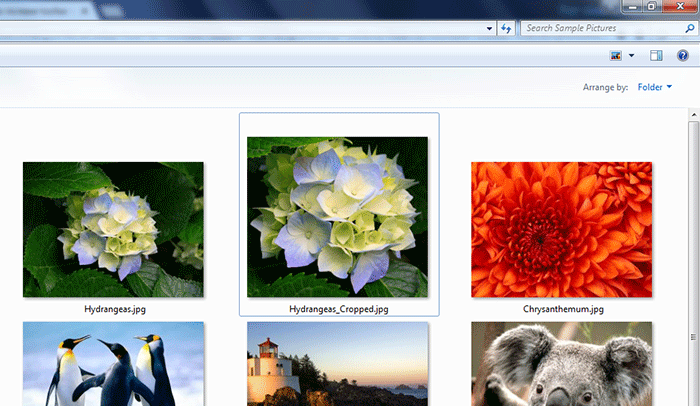
Step 6. Observe the cropped image & the original image in Windows Explorer. And observe the difference.

Please give your feedback through the below Comments.
🙂 Sahida